Altula
Welcome to Altula UK
- Contact Us
- Contact Us
- 877-908-2113 (Canada)
- +44 (0) 2036 080 627 (UK)
- Sales
- Languages
In this example, you’ll learn to use chart properties tools to set the chart background color, box properties tools to customize the color and shape of chart boxes, and the master page to add a title and company logo to all sub-charts.
Step 1: Set your box properties.
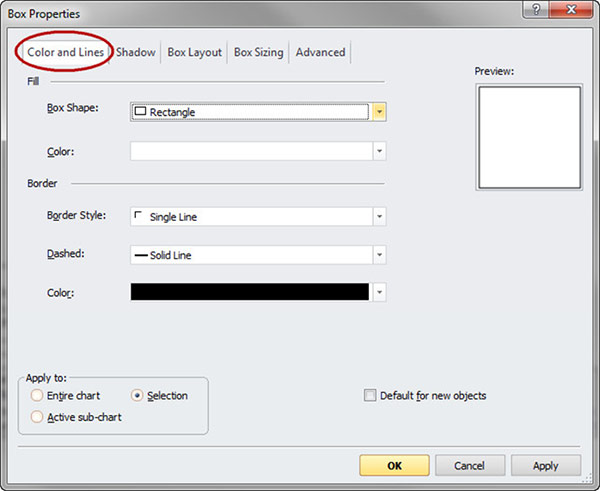
– Right-click any chart box and select Box Properties.
– Use the Color and Lines tab to change the box shape, fill color, border style and color.
*Tip: Select ‘Apply to: Entire chart’ to apply formatting to all chart boxes. Click OK.


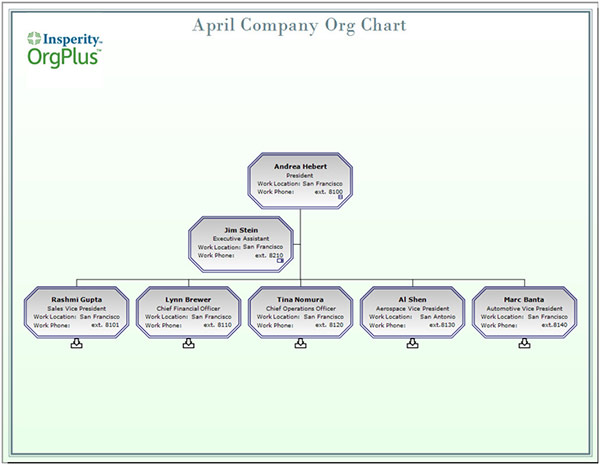
– In this example, the original box style (shown on left) was changed in the following ways: an octagonal box shape was selected, the box border was increased to a double line and a dark blue border color was applied, and the box fill color was set to a gray and white gradient.
Step 2: Apply formatting elements to the master page.
– Click the Master Page button on the View menu.
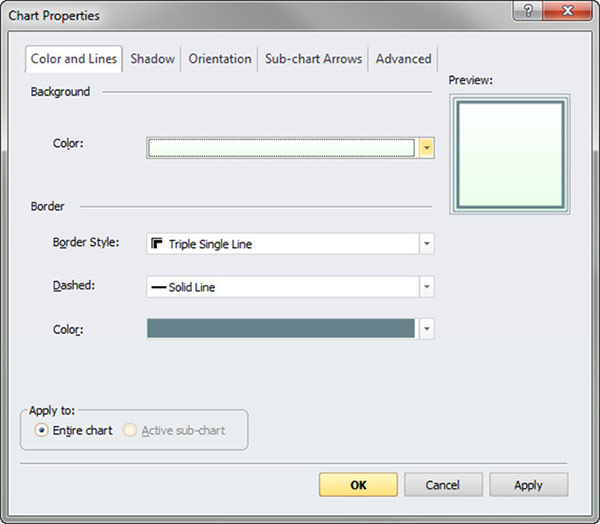
– Select Properties from the Home menu.
– Click Color and Lines and select a background color and border.

– Open the Insert menu and select Picture. Browse to and open your company logo image file.
– Click in the header area at the top of the master page and type your company name or a title for your chart. Use the Font tools on the Home menu to format your text.

– Return to normal view by selecting Normal from the View menu. *Note that the background color, page header, and company logo now appear on each sub-chart in the project.

– To save this formatting to apply to future charts, select Save As from the File menu and select the Insperity OrgPlus Template file type.
OrgPlus provides intuitive formatting tools to help you put your company’s unique style stamp on all of your org charts. Use the tools described here to customize and brand your charts.
Please contact us at sales@altula.com or sales@altula.co.uk (Europe) to upgrade or purchase OrgPlus!