Altula
Welcome to Altula UK
- Contact Us
- Contact Us
- 877-908-2113 (Canada)
- +44 (0) 2036 080 627 (UK)
- Sales
- Languages
In this example, you’ll learn to combine individual records from a branch into a multi-record box.
Step 1: Set a box to a multi-record box style.
– Right-click any one of the boxes among those to be combined and select Box Properties.
– Use the Box Layout tab and then select Layout Options.
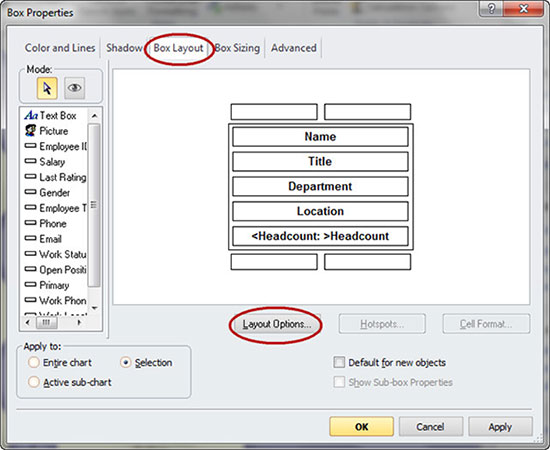
– Click the Multi-record tab and check the Multi-record box. *Note: if your box will contain 8 or more records, consider increasing the number of columns to two. Click OK.
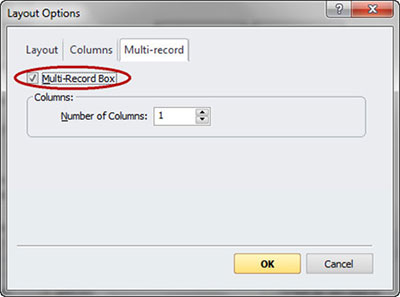
– The Box Properties/Box Layout tab now shows the default layout for a multi-record box. Click OK.
Step 2: Add records to the multi-record box.
– Drag and drop a box into the multi-record box. The multi-record box is highlighted in green when the box to be added is in the correct location to be dropped. *Note: A small yellow folder icon also indicates that the moved record will be dropped into (rather than as a subordinate to) the multi-record box.
– Repeat the previous step with all records to be added to the multi-record box.
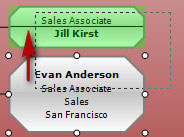
Step 3: Format the multi-record box.
The default layout for a multi-record box includes the Title field underscored by a dividing line.The name field of each record is displayed below the dividing line.

To change the format:
– Right-click the multi-record box, select Box Properties, and click the Box Layout tab.
– To change or add additional fields to the top of the multi-record box, drag and drop fields between the box and the list of fields on the left.
– To change or add additional fields for each record, check the Show Sub-box Properties box.
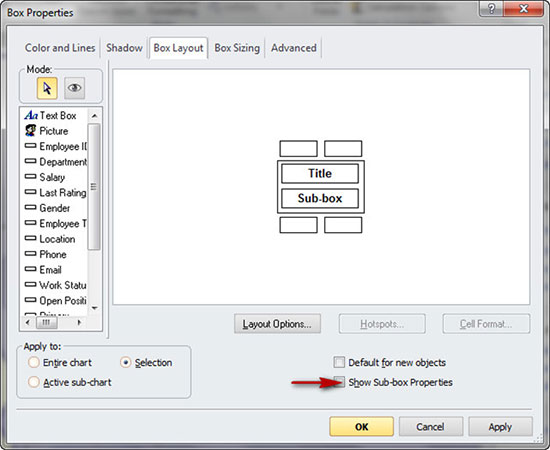
– Drag and drop a field(s) between the sub-box and the list of fields on the left. *In this example, the employee type field has been added to the sub-box display.
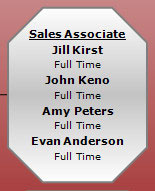
Try the multi-record box tool and discover how clear and concise your charts can be when records are combined.